No products in the cart.
How do I Download a product I purchased? Leave a comment

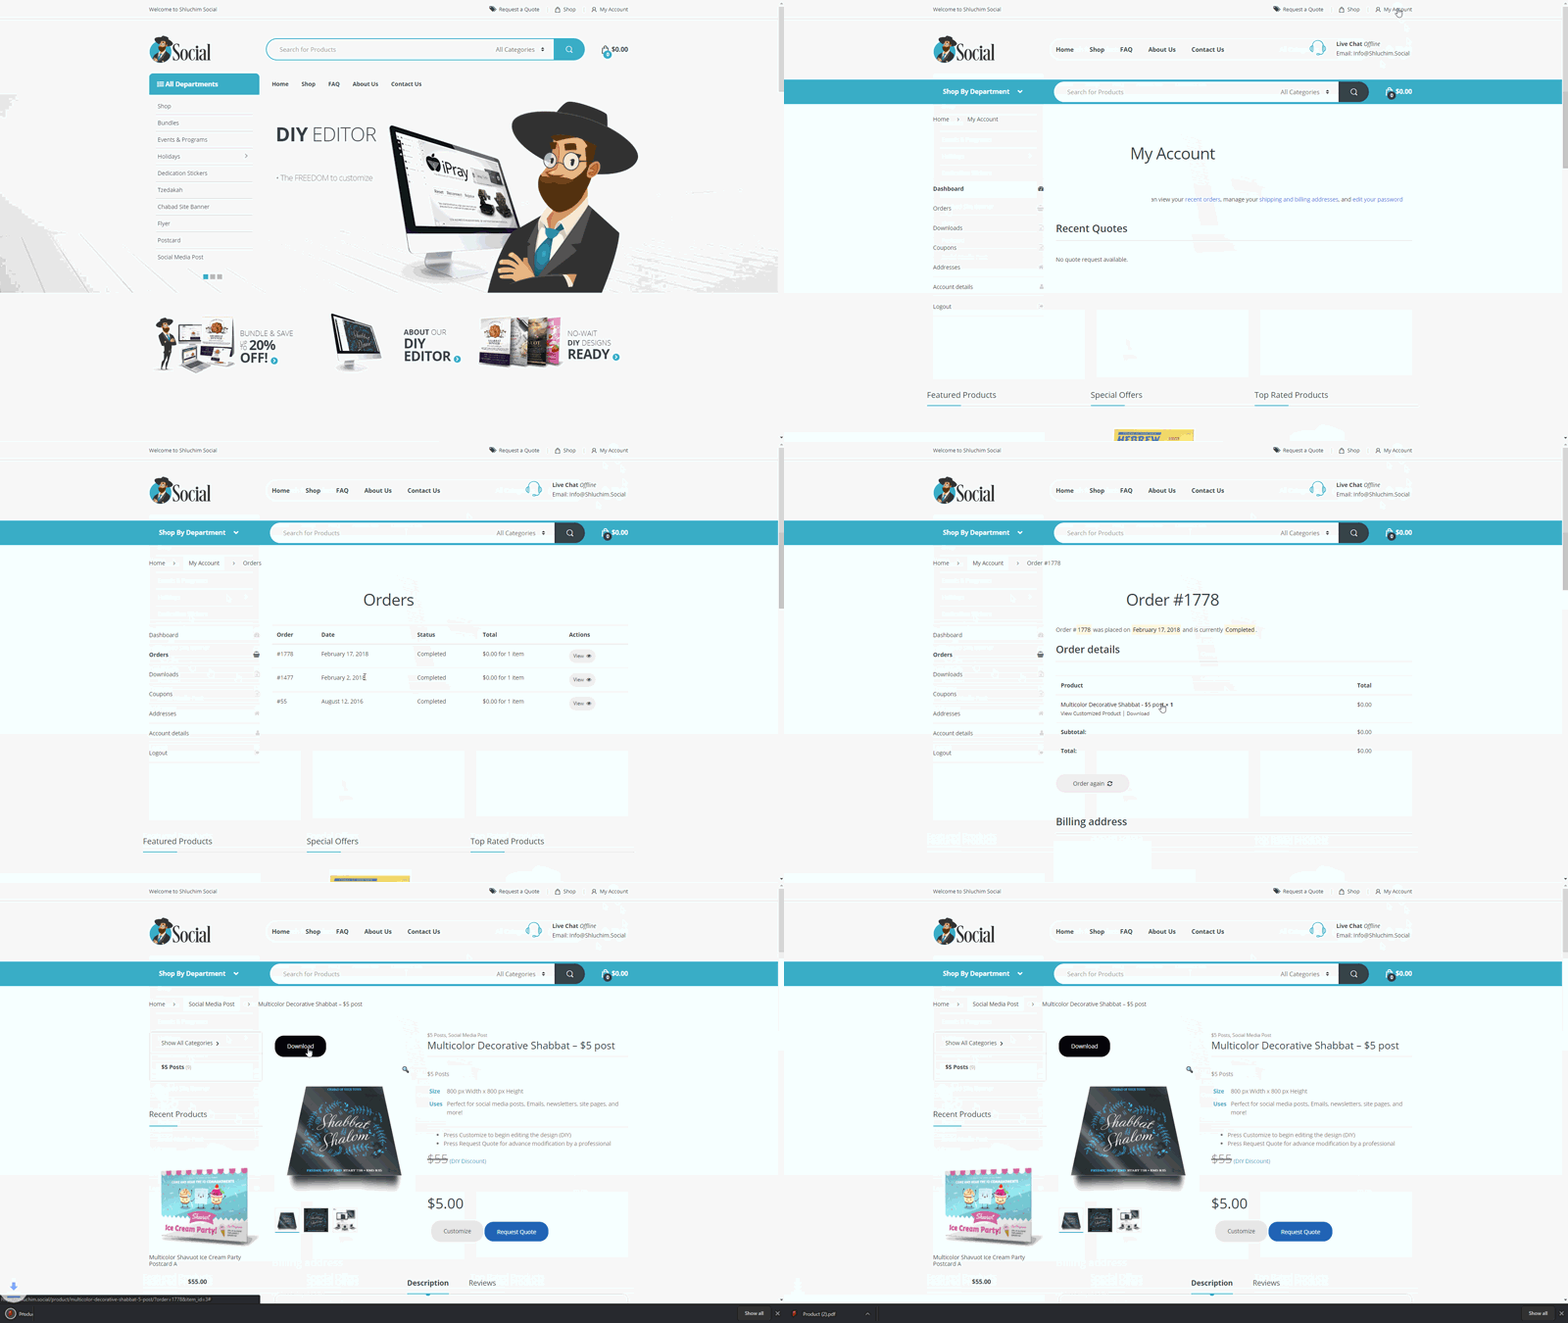
To download a product you have purchased, you need to first locate it in your purchase history.
- To do so you must first go to your account, by clicking on “My Account” located on the top right side of your screen.
- Next proceed to your “Orders”
- In the Orders tab, you will see all of your current purchases. Locate the product you would like to download, and click on tie View Button under the actions column.
- Under the Products title you can click on download, which will lead you to the product page to verify that it is the correct product.
- If this is the product you would like to download, simply press the new download button located above the preview image.
PLEASE NOTE
Simple Answer: Prior to paying for a DIY product, make sure you have edited everything to your exact needs. Once you have purchased the item, any additional changes will require a NEW purchase. But don’t worry, additional savings will be provided if you require the same item in the future!
Reasoning: Using our DIY designer we are able to bypass the need of our design team, leading to faster turn around time and savings which we extend to you! Using a DIY editor allows you to be fully in charge of the editing process, allowing you to have everything as you would like it, and ready as soon as you are done.
As with any design service, once you finalize the order and you have access to the file, the order is complete. If you require additional edits in the future, it would require a new order to open, with new charges. Being that we have automated this process, the order closes as soon as you pay to differentiate future orders.
But we value your patronage, and offer discounts for repeat purchases! A coupon code, or automatic discount, will be provided to you after a period of time; usually a month. This coupon is typically valid for at least a year, so if you would like to use the same design again, enjoy the extra savings! Remember you can save even more by bundling!
Simple Answer: Your design is present at 72 DPI but is the correct size for a printed 300 DPI file. This may show up as a larger size file in inches. Simply notify your printing provider to convert it to 300 DPI, remind them of the actual size, or contact us for a converted file; its FREE, just let us know the the order# and format you would like it in.
Reasoning: Digital content is present at 72 DPI, dots per inch, but when you print it is typically around 300 DPI. So a typical 300 dpi flyer of size 8.75in by 11.25 in with bleed would be 2625 px by 3375 px ; where px stands for pixel which is a digital dot. Since you digital content, is present at 72 DPI, we created our items in equivalent px size, but when downloaded it will state a larger size in Inches.
Simple Answer: Digital content is presented in digital coloring; RBG, which is more vibrant, while printing is done with actual colors; CMYK. Most printing services will automatically convert the file by themselves, however, you require a CMYK for any reason, contact us for a converted file; its FREE, just let us know the the order# and format you would like it in.
Reasoning: Digital content is present in RBG (Red, Blue, and Green) coloring, while printing is typically done is CMYK (Cyan Magenta Yellow Black). Our DIY Editor is integrated into the site, and will provide files in the native digital format; RBG. The difference to a consumer, is that digital coloring is typically more vibrant, as compared to printed materials. Typically a printing service will automatically convert RBG files to CMYK files, but if it presents an issue we will freely convert it for you.
Total 0 Votes
0
0
